May 27, 2011

Creamy Caprese Pasta.


Raise your hand if you love basil.

You better believe my hand is up high in the air. Fresh basil is one of my very favorite things. The smell, the taste, I love it all. And when summer starts rolling in and the basil is super fresh? Mmmmm.

I saw this recipe on How Sweet It Is on Monday & put the ingredients on my shopping list right that very second. When a restaurant has a Caprese sandwich or salad, I almost always order it. Juicy ripe tomatoes? Yes, please. Basil? Obviously. Fresh mozzarella? Heck yes. Perfection! (And it doesn't hurt that a favorite sandwich at a local restaurant adds proscuitto, too!)

This pasta is all of that Caprese yumminess in a baked pasta. It's good. Really good.

Creamy Caprese Pasta
Slightly adapted from How Sweet It Is

1 lb pasta (I used whole wheat penne)
1 1/2 C pasta/tomato sauce
1/3 C heavy cream
1/3 C freshly grated parmesan cheese, plus more for garnish
8 oz fresh mozzarella - 4 oz cut into cubes, 4 oz cut into thin rounds
1 pint of grape tomatoes, halved
5 - 7 (depending on size) basil leaves, plus more for ganish
 
Preheat oven to 350°.

Boil water and cook pasta according to directions.

While pasta is cooking, heat tomato sauce over low heat in a large saucepan. Once warm, stir in heavy cream and grated parmesan.

Once pasta is done cooking, drain and return to the large pot, off heat. Pour warmed tomato sauce + cream onto pasta, mixing to coat. Fold in mozzarella cubes and tomatoes, and chopped basil leaves.

Spray a baking dish with non-stick spray and pour the entire pasta mixture into the dish.

Top with fresh mozzarella rounds. Bake for 25 minutes, or until cheese is golden and bubbly.

Top with additional fresh basil and grated cheese.

May 13, 2011

Lemon Frosting.


We celebrated my husband's 30th birthday last week. For the party, I made a cake & cupcakes, but wanted to try a new frosting. I saw Pioneer Woman's post for the Best Frosting I've Ever Had a while back, and decided to give it a shot on for his birthday. 

The frosting recipe is just vanilla though, and since I was pairing it with vanilla cupcakes, I wanted to add more flavor. I used lemon curd, since (1) I had it in my refrigerator, and (2) I love lemon. 

And the frosting? It might really be the best I've ever had (cream cheese frosting excluded, which does have place & time). I made a little bit without the lemon curd, too, so I could sample both ways. The frosting is light and sweet. And with the addition of lemon curd, perfectly tart. I received several compliments at the party - It is SO good!, I've never had frosting like this before!, It is so light & almost tastes like whipped cream!.

A new go-to that we will be using again & again.

Lemon Frosting 
Slightly Adapted from Tasty Kitchen  

5 Tablespoons Flour
1 cup Milk
teaspoon Vanilla 
1 cup Butter 
1 cup Granulated Sugar
1/3 C lemon curd

In a small saucepan, whisk flour into milk and heat over medium, stirring constantly, until it thickens. You want it to be very thick - thicker than cake mix, more like a brownie mix. Remove from heat and let it cool to room temperature. Stir in vanilla.

While the mixture is cooling, cream the butter and sugar together until light and fluffy and until there is no more sugar graininess.  Add the completely cooled milk & flour mixture and lemon curd. Beat it on high speed, until it all combines and resembles whipped cream. If it looks grainy or separated or weird, beat it longer.

Spread onto a cooled cake or cupcakes.

April 27, 2011

Orange Ricotta Pancakes with Strawberry Sauce.


I don't have a picture of the final product because, um, well, we ate it too quickly. These were so, so good.

Sometimes my favorite recipes come out of necessity - I will have a certain ingredient in my refrigerator or pantry that I used for one recipe, but it isn't something that I use in my everyday cooking, so I go searching.

In this case it was ricotta cheese, that I used to make a lime tart for Easter. I have pasta recipes that use ricotta, but I wasn't in a pasta mood yesterday. So I hunted. I remember seeing recipes for lemon ricotta pancakes and thought that sounded like a good place to start. So I Googled around and found one from Two Peas and Their Pod with a blueberry sauce that looked great.

However, I had a bunch of oranges from my in-laws' tree and fresh strawberries that needed to be used, too. So I improvised and made a couple changes. And now this will be a recipe we make over & over again, for breakfasts on the weekend or breakfast-for-dinner, like we had last night.

Orange Ricotta Pancakes with Strawberry Sauce
Adapted from Two Peas and Their Pod

For the sauce:
1 1/2 Tbsp fresh lemon juice
1 1/2 tsp cornstarch
2 C fresh strawberries
3 Tbsp sugar
2 Tbsp water
Splash (3 Tbsp or so) fresh orange juice.

In a small bowl, combine the lemon juice and cornstarch and set aside.

In a medium saucepan, combine the strawberries, sugar, water, and orange juice. Bring to a boil over high heat. Reduce to a simmer and stir in lemon juice and cornstarch mixture. Stir until the sauce thickens slightly. Cover to keep warm and set aside.

For the pancakes:
1 1/4 C all-purpose flour
3 Tbsp sugar
2 tsp baking powder
1/2 tsp baking soda
1/4 tsp salt
1 C ricotta cheese
1 large egg
2 large egg whites
1/2 C fresh orange juice
2 tsp grated orange zest
1 Tbsp canola oil
1 Tbsp milk

In a large bowl, whisk together flour, sugar, baking powder, baking soda & salt.

In a medium bowl, whisk together ricotta cheese, egg, egg whites, orange juice, orange zest, canola oil, & milk. Gently fold this mixture into the dry ingredients until flour disappears. Don’t over mix; the batter will be quite thick.

Heat a griddle or a nonstick skillet over medium heat. Spray with cooking spray. Drop about 1/3 cup of batter onto the hot griddle or skillet. Cook the pancakes until browned on the underside and beginning to set, about 2 minutes. Flip and cook the pancakes on the other side, about two minutes longer. Continue making pancakes until batter is gone. Serve warm with strawberry sauce.

April 22, 2011

Curried Chicken Salad.


I often get in a lunch rut - skipping it altogether, grazing, or eating a simple salad. For Christmas, my mother-in-law gave me a cookbook from Alice's Tea Cup in NYC, featuring many of their popular recipes. I bookmarked their curried chicken sandwich, thinking it was a fun twist on a classic & would add some pizazz to my otherwise boring weekday lunches.

It is one of those recipes that is perfect on a day where you want something different, but don't have the time or energy to go to the store; chances are you have all the ingredients in your refrigerator/pantry right now (& if not, simple substitutions can be made). The recipe makes enough for 4-6 sandwich servings, but can easily be scaled up or down.

The chicken was perfectly moist from being roasted and the salad was a perfect combination of tangy & sweet. This was a wonderful addition to my lunches this week and will be a recipe I make again.

Curried Chicken Salad
Alice's Tea Cup

4 medium boneless, skinless chicken breasts
2 Tbsp curry powder
1/4 C apricot jam
1/4 C sour cream
1/4 C mayonnaise
1/4 C finely chopped celery
1/4 C finely chopped red onion

Preheat oven to 350° F.

Rub the chicken breasts with 1 Tbsp of the curry powder, place them on a baking sheet, and roast until a meat thermometer registers 160° F, about 20 minutes. Let cool.

Meanwhile, in a large mixing bowl, combine the remaining 1 Tbsp curry powder with the apricot jam, sour cream, and mayonnaise.

When the chicken is cool, cut it into 1/2-inch cubes. Add the chicken, celery, and onion to the bowl and stir well. Season to taste with salt & pepper.

Serve on sliced bread, in a wrap, or over a bed of greens.

April 6, 2011

Easy Granola.


Greek yogurt + granola + a drizzle of honey is one of my favorite breakfasts. I'm not quite sure why, but I have always bought my granola - in the form of a cereal or in the bulk section of my local market.

I had pulled a granola recipe from Real Simple a while back & finally decided to make it. It was easy, easy - although I wish I would have stirred a little more carefully midbaking, as I got oats all over the inside of my oven. And it was good too - not too sweet (maple syrup is the only sweetener), good crunch, and yummy chewy bits of dried fruit.

Stored in an airtight container, the granola will keep for 3 weeks.

Easy Granola
Real Simple, April 2010

4 C old-fashioned rolled oats (not quick cooking)
1 C sliced almonds
1/2 C shredded coconut
1/4 C unsalted pepitas or shelled sunflower seeds
1/2 C pure maple syrup
2 Tbsp canola oil
1/2 tsp kosher salt
1 C dried fruit (I used a berry blend)

Heat oven to 350° F. On a rimmed baking sheet, toss the oats, almonds, coconut, and pepitas with the maple syrup, oil, and salt.

Bake, tossing once, until golden and crisp, 25-30 minutes.

Add the dried fruit and toss to combine. Let cool.

April 1, 2011

March wrap up.

Thanks to everyone who participated in the challenge for March!!

Let's recap the recipes...

Looking for a great appetizer or snack? Try Brooke's 7 Layer Dip or Unflame's Pretzels.

Stumped when it comes to side dishes? Try Carol's Cuban Sweet Potato Salad or Uniflame's Squash Risotto.

Main dishes this month: Michelle made Creamy Chicken Taquitos, Bev made Pulled Pork with Root Beer, JoAnn gave Sloppy Joe's a vegetarian spin with lentils & seitan, Uniflame made Spanikopita, Trish made Chicken Pot Pie, & Kristina made Chicken Penne.

Need something for your sweet tooth? Try my Lemon Blueberry Crumb Bars, Mint Chocolate Chip Cookies, or Strawberry Shortcakes, or Margot's Hot Date Bars.

And for the two most unique (to me) recipes this month that had me quite interested? Judith's Soy Sauce Eggs & Uniflame's Danish Stamppot (Lettuce Mash Pot).

Lots of fun recipes that I can't wait to try!

- - - - - - - - - -

Michelle is hosting for April, so be sure to head over to post your new recipes!

- - - - - - - - - -

And now, for the random winners of this month's giveaway...
Number 3: Michelle & Number 7: Judith!!


I have two cookbooks to giveaway: Four Ingredient Cooking or Salads: delicious, fresh & healthy

Whoever responds first can have their choice and I will send the other book off to the second winner. Both cookbooks are brand new, never used.

Email me at elise (dot) hope (at) gmail (dot) com with your shipping information so I can get your prizes off to you!

March 24, 2011

Strawberry Shortcakes.


We are getting together with family tonight & I volunteered to bring dessert. After making super rich chocolate mint brownies last week for St. Patrick's Day & then a chocolate peanut butter torte when we had friends over on Tuesday, I thought it would be best to make something lighter this time. I had a huge container of strawberries in my refrigerator that I needed to use sooner rather than later. So naturally, my thoughts drifted to strawberry shortcakes, one of my favorite light(er) desserts.

Now, I have made strawberry shortcakes a few times before, but I never was crazy about the shortcake recipe I used. It was alright, but not anything special. So today, I turned to one of my older cookbooks & decided to use their shortcake recipe, that I had bookmarked sometime ago.

I had a big oops when I was making this... When I "made" my buttermilk, I accidentally poured the entire cup of liquid into the flour mixture, instead of the 3/4 C the recipe called for. I didn't realize it until I turned out the dough to cut the shortcakes & had a sticky, wet mess in front of me. I would have just doubled the recipe, but I didn't have another cube of butter. So I improvised by adding more flour, until the dough seemed to be the right consistency, and then added just a touch of sugar to balance out the additional flour. But I didn't think to add more baking powder, so my shortcakes didn't rise like the should have. None of this impacted the taste (which was amazing), but it did mean that I couldn't cut my shortcakes in half and instead just used one flat shortcake for the top & one flat shortcake for the bottom.

Taste wise, this recipe blows my old one out of the water. I loved it. The shortcakes had just the right amount of sugar (which one was thing I didn't like about my old recipe - not sweet at all). And the lemon zest? Such a great addition. I loved tasting a bit of lemon with every bite. These are a perfect treat to welcome spring!

Strawberry Shortcakes
Williams-Sonoma Desserts

For the shortcakes:
1 2/3 C all purpose flour
2 Tbsp sugar
1 Tbsp baking powder
1 tsp lemon zest
3/4 tsp salt
1/2 C cold unsalted butter, cut into small pieces
3/4 C buttermilk
1/2 tsp vanilla extract

Filling:
4 C strawberries, hulled and cut into slices
1/4 C sugar
Sweetened whipped cream

Preheat the oven to 400°.

In a bowl, whisk together the flour, sugar, baking powder, zest, and salt. Using a pastry blender (or your fingers), cut in the butter until the pieces are no larger than peas. Add the buttermilk and vanilla and gently toss with a rubber spatula until the flour is just moistened and the ingredients are blended.

Turn the dough onto a lightly floured surface. Gently press the dough into a thick rectangle about 6 x 4 inches. Trim the edges with a large sharp knife, then cut the dough into six equal squares.

Place the squares on an ungreased baking sheet, spacing them well apart. Bake until they are puffed and golden, 15-18 minutes. Transfer to a wire rack & cool slightly or completely.

Meanwhile, in a bowl, toss the strawberries and sugar. Cover the berries and refrigerate until well chilled, or until ready to use.

To serve, split the shortcakes in half horizontally and place the bottom halves, cut side up, on serving plates. Spoon some of the strawberries, including the juices, over each half and top with a dollop of whipped cream. Top with remaining shortcake halves, cut side down. Serve immediately.

March 15, 2011

Mint Chocolate Chip Cookies.


I feel like I am cheating by posting this; it was that easy. I mean, it uses ready made cookie mix. No measuring, no opening flour & sugar & baking soda. While I do try to avoid making cakes & cookies from boxes, sometimes, the box works in a pinch & produces great results. And when I saw this recipe last week, I knew that a doctored up mix would taste just as good as any similar from scratch cookie.

I made these for a St. Patrick's Day picnic I am attending on Thursday. Perfectly festive & who doesn't like chocolate + mint? If you need a quick & festive & yummy green treat this week, give these a shot.

Mint Chocolate Chip Cookies
Betty Crocker Recipes

1 pouch (1 lb 1.5 oz) Betty Crocker sugar cookie mix
1/2 C butter, softened
1/4 to 1/2 tsp mint extract
6 to 8 drops green food color [I used gel coloring - it's all my local grocery store had - & wished I would have added more, to get the cookies a darker green; I would recommend being liberal with the food coloring]
1 egg
1 C creme de menthe chips [Andes brand]
1 C semisweet chocolate chips

Heat oven to 350°F. In large bowl, mix cookie mix, butter, extract, food color and egg with a hand mixer until soft dough forms. Stir in creme de menthe baking chips and chocolate chips.

Roll into teaspoon sized balls and drop dough 2 inches apart on ungreased cookie sheet.

Bake 10-12 minutes or until set. Cool 3 minutes; remove from cookie sheet to wire rack. Serve warm or cool completely. Store tightly covered at room temperature.

March 1, 2011

March Link Up!

Welcome, welcome!!

I am excited to be your hostess this month for our challenge!

Are you guys having fun? I am sure am. Although my folder of to-make recipes is growing rather than shrinking as a result! Anyone else?!

The challenge is easy:
1. You know that stack of recipes you have been wanting to try? Pull one out. What? You don't have a stash? Then just find any new recipe.
2. Make it.
3. Blog about it, including if you would make it again.
4. Link up and then see what other people are making this month, too.

When you link up, please use the following format:
Your Name: Elise (Baked Potato Soup)
Your URL: http://elise-whipupsomethingnew.blogspot.com/2011/02/baked-potato-soup.html


If you haven't joined in the challenge yet, you can start now. The more the merrier!

Also, there will be a prize for two lucky participants who try a new a recipe this month! I haven't 100% decided on a prize (I am toying with a couple ideas), but it will most likely be kitchen related (this is a cooking challenge after all!). The winners will be selected using random.org & each unique recipe that is linked up will count as a separate entry. To be qualified for the prize, you must post your recipe links by March 31st at 8:00 PST.

On April 1st, I will do a round up of the entries & announce our winners!

Have fun Whipping Up Something New this month!

Lemon Blueberry Crumb Bars.


My husband asked me if I would make a treat that he could take over to a couple families he visits monthly for our church. Since we take goodies to these families frequently, I often use it is a chance to try new recipes, so that we don't have massive amounts of baked goods sitting around our house.

Since I made brownies last month, I decided to do something non-chocolate & lighter this month. This recipe for Lemon Blueberry Crumb Bars I found months ago sounded perfect. Admittedly, they are probably a better spring/summer treat, but living in San Diego, I can almost always get good quality fresh blueberries, and after a very rainy weekend, a splash of springtime sounded just perfect.

These were easy to make, especially using a food processor to combine the dough. I have made bars that have a similar base in the past, but this recipe produced a dough that was much more dry than I had used previously & I tripled checked to make sure that I used all the exact measurements. However, once I started patting the dough into the pan, I quickly realized the dough was the perfect consistency.

These bars were a really good, light treat. And because they were not too sweet, I think they would be perfectly acceptable as breakfast, too. My only complaint was that I didn't really taste the lemon zest, so next time, I think I will add more, because I really love citrus.

Lemon Blueberry Crumb Bars
My Baking Addiction

1 C white granulated sugar
1 tsp baking powder
3 C all-purpose flour
1 C unsalted butter
1 egg
1 tsp pure vanilla extract
1/2 tsp kosher salt
zest of two lemons
4 C fresh or frozen blueberries
1/2 C white sugar
3 tsp cornstarch

Preheat the oven to 375° F. Line a 9×13 inch pan with parchment paper and spray with nonstick cooking spray.

In a medium bowl, stir together 1 cup sugar, 3 cups flour, salt, lemon zest and baking powder.

In a small bowl, whisk the egg and vanilla together until combined.

Use food processor to blend the flour mixture with the butter and egg/vanilla mixture. Dough will be very crumbly.

Pat half of dough into the prepared pan.

In another bowl, stir together 1/2 C sugar and cornstarch. Gently mix in the blueberries. Sprinkle the blueberry mixture evenly over the crust. Crumble remaining dough over the berry layer.

Bake in preheated oven for 45 minutes, or until top is slightly brown. Cool completely before cutting.

- - - - - - - - - -
Technically, I made these in February (the 28th!), but since Trish already did her round up & I didn't get my post finished until this morning, it's going for March.

February 24, 2011

Spicy Lemon Garlic Shrimp.


For the last three weeks, we have been operating under the assumption that my husband had celiac disease (we now know that he doesn't), which meant that I spent a ton of time doing research and hunting down gluten-free recipes. It's not like we had bread at every meal, but we do eat pasta probably once a week and paninis, pizza, & pulled pork sandwiches are regulars in my meal rotation.

All of that was no longer fair game, which made me feel like there was this huge hole in my dinner repertoire. We tried a few gluten-free versions of our favorite products, but it just wasn't the same. I began my search for everyday recipes that just happened to not contain any gluten products. I looked to my normal sources for recipe inspiration & stumbled across this shrimp dish from The Pioneer Woman. I figured I could serve it with a side of rice and it would be a perfect weeknight meal, regardless of my husband's tolerance (or lack there of) to gluten products.

When I eat shrimp, I want to eat it, not be bothered with taking off shells or pulling off tails, so I always get rid of the shells/tails them before I cook my shrimp. For this dish, I bought frozen shrimp that were deveined, shelled, & tail free.

Now, I am not exaggerating when I say that this was the easiest & fastest dinner I have made in months. I just threw everything in the food processor, pulsed a few times, and sprinkled the butter mixture on the shrimp. At the same time I popped the shrimp in the oven, I started some jasmine rice. It took less than 5 minutes of preparation and really only dirtied three dishes (food processor, pot, baking sheet).

I served the shrimp over the rice, with the extra juices poured on top. It was a really, really good dinner. And spicy, too! Which we love.

Spicy Lemon Garlic Shrimp
The Pioneer Woman

2 pounds raw shrimp, deveined
2 sticks cold unsalted butter, cut into pieces
1 tsp kosher salt
4 cloves garlic, peeled
1/4 C fresh flat leaf parsley
1/2 tsp crushed red pepper
1 whole lemon, juiced

Preheat oven to 375°.

Rinse frozen shrimp to separate, then arrange in a single layer on a baking sheet.

In the bowl of a food processor, add cold butter, garlic, lemon juice, salt, parsley, and red pepper. Pulse until combined. Sprinkle cold butter crumbles over the shrimp.

Bake until shrimp is opaque and butter is hot and bubbly, about 20-25 minutes.

- - - - - - - - - -
I halved the recipe, of course, but still added 1/2 tsp crushed red pepper, because we like the heat.

When I was making this, I thought that it would be so good (& a fun twist) to use lime juice instead of lemon juice and cilantro instead of parsley. And then add black beans over the rice as well. Same dish, but with a Tex-Mex flavor. Next time!

February 23, 2011

Baked Potato Soup.


It was a perfectly crisp day yesterday & I had a craving for soup. 

When I found this recipe, I knew I would like it. Potatoes, bacon, cheese? Yes, please. Plus, the recipe reminded me of a potato cheese soup my mom makes, but much easier (sorry, mom!), so in addition to sounding good, it had a nostalgic quality, too. I bookmarked it for future reference.

It really was super easy and came together in a snap. And the results? It tasted great, totally filled us up, and warmed us from the inside out. All requirements for a great bowl of soup, I think. Plus, I love any recipe that I don't have to go to the grocery store for!

Baked Potato Soup
slightly adapted from goodLife{eats}

2 baking potatoes
1 Tbsp butter
1/3 cup all-purpose flour
3 cups milk, plus more, if desired
2 ounces shredded cheddar cheese, plus extra for garnish
1/2 teaspoon salt
1/4 teaspoon black pepper
1/4 teaspoon paprika
1/2 cup sour cream
5 slices center cut bacon, cooked and crumbled

Preheat oven to 400°.

Pierce potatoes with a fork and bake for 1 hour or until tender. Let cool. Peel potatoes, discard skins, and coarsely mash.

Melt butter in a large dutch oven or stock pot. Add flour, whisking to combine with the butter. Gradually add milk, stirring with a whisk until blended. Cook over medium heat until thick and bubbly (about 8 minutes). Add potatoes, cheese, salt, pepper, and paprika, stirring until cheese melts. Remove from heat.

Stir in sour cream and any additional milk to reach desired consistency (I used about 1/3 C). Cook over low heat until thoroughly heated (do not boil). Add additional salt and pepper if desired. 

Sprinkle each serving with cheese & bacon.

- - - - - - - - - - 
The original recipe calls for 2% milk & reduced fat sour cream; I used skim milk & fat free sour cream, since that is what I had in my refrigerator. I also halved the recipe, since I cook for two.

February 8, 2011

White Chili.


I love soup. And chili. It is so comforting. But this winter, we haven't really had soup weather many days & I think I am living in one of the few places in the US that isn't under attack by snow/ice/frigid temperatures. 

But yesterday, despite our warm & sunny day, I wanted something warm and comforting, that could simmer on the stove while I did other errands and chores. I pulled out this old recipe for White Chili from Pioneer Woman. Don't you love her recipes? I haven't made something of hers that I didn't like. 

And this chili was no exception. Although, for me, it wasn't so much of a chili as it was a soup. My finished product looked nothing like hers, but it still tasted really good. The recipe calls for 7-8 cups of chicken stock; I added 8. If you are wanting more of a chili, then I would suggest adding only 7. 

White Chili

3 Cups Cooked Chicken, shredded
1 whole Medium Onion, Diced
4 cloves Garlic, Minced
2 whole Cans Green Chilies, Chopped
1 pound Dried Great Northern Beans, Rinsed
8 cups Chicken Broth
1 whole Jalapeno, Sliced
1 1/2 Tbsp Ground Cumin
½ tsp Paprika
½ tsp Cayenne Pepper
Salt To Taste
White Pepper, To Taste
1 cup Whole Milk
2 Tbsp Masa (corn Flour) OR Cornmeal
Grated Monterey Jack, To Taste

In a dutch oven over medium-high heat, saute onions and garlic for 2 minutes. Add chopped green chilies, then rinsed beans. Pour chicken broth into the pan. Add sliced jalapenos. Season with salt, pepper, and cumin. Place lid on pot and reduce heat to low.

Cook for 2 hours or until beans are done. Halfway through the cooking process, add 3 cups of cooked chicken.

When beans are tender, mix milk with masa (or cornmeal) and pour into the chili. Cook for an additional ten minutes to thicken. Check seasoning and adjust, adding cayenne pepper and paprika if desired.

Add some Monterey Jack cheese to the pot and stir to melt.

Serve chili in a bowl. Garnish with cilantro, sour cream, extra cheese, &
diced avocado.

February 3, 2011

Cinnamon-Buttermilk Muffins.


The date-stamp on the bottom of this printed recipe? 12/11/2005. This one wins for oldest recipe in my stash (cookbooks excluded).

A friend of mine, back in college, made these for a game night. I think I consumed three on the spot. I went home & printed out the recipe. And it sat. And sat. I have looked at it over the years numerous times and thought about making them, but it just never happens. Thank you Whip Up Something New for kicking me into gear on these little wonders.

And they are SO easy and SO yummy. They remind me of a little cake doughnut. But not overly sweet, so you don't get that sugar slump feeling, like after eating doughnuts, and the cinnamon on top is just perfect. We actually had them as a treat after dinner & they did just the trick. They are definitely going to be a new staple around here. And who knows...maybe for a game night with friends?

The recipe for the topping makes more than you need for the nine muffins. I halved the cinnamon/sugar mixture (although, if you make it all, the extra would be divine on toast!), but melted all the butter & had extra. I would say that I used more than half the butter, so maybe cut it back to 4 - 5 Tbsp?

Cinnamon-Buttermilk Muffins
Williams-Sonoma

For the muffins:
7 Tbsp unsalted butter, at room temperature
2/3 cup sugar
1 egg
1 1/2 cups all-purpose flour
1 1/2 tsp baking powder
1/2 tsp baking soda
1/2 tsp salt
1/2 tsp freshly grated nutmeg
1/2 cup buttermilk
1 1/2 tsp vanilla extract

For the topping:
2/3 cup sugar
1 Tbsp ground cinnamon
6 Tbsp unsalted butter, melted

Preheat an oven to 350°F. Grease 9 standard muffin cups with butter or butter-flavored nonstick cooking spray; fill the unused cups one-third full with water to prevent warping.

To make the muffins, in the bowl of an electric mixer fitted with the flat beater, combine the butter and sugar and beat on medium speed until light and fluffy. Add the egg and beat well until pale and smooth.

In another bowl, stir together the flour, baking powder, baking soda, salt and nutmeg. Add to the butter mixture in 2 additions, alternating with the buttermilk and vanilla. Stir just until evenly moistened. The batter will be slightly lumpy.

Spoon the batter into the prepared muffin cups, filling each three-fourths full. Bake until the muffins are golden, dry and springy to the touch and a toothpick inserted into the center of a muffin comes out clean, 20 to 25 minutes. Transfer the pan to a wire rack and let cool for 5 minutes. Unmold the muffins and let stand until cool enough to handle.

To make the topping, in a small, shallow bowl, stir together the sugar and cinnamon. Put the melted butter in another small bowl. Holding the bottom of a muffin, dip the top into the melted butter, turning to coat it evenly. Immediately dip the top in the cinnamon-sugar mixture, coating it evenly, then tap it to remove excess sugar. Transfer the muffin, right side up, to the rack. Repeat with the remaining muffins. Let cool completely before serving. Makes 9 muffins.

January 31, 2011

Scrambled Egg Enchiladas with Black Bean Sauce.


Breakfast is one of my favorite meals to make. But during the week? It just doesn't happen. I look forward to Sundays, where we sleep in just a little bit and I can make and enjoy a good breakfast, without having to run out the door.

Most of my breakfast recipes are of the sweet variety, because I have found that good savory breakfasts recipes are harder to come by. So I am always on the lookout for them.

This recipe for Scrambled Egg Enchiladas with Black Bean Sauce seemed right up my alley - I love Mexican food and black beans are one of my very favorite things to eat.

The original recipe makes six (small) servings. Since there are only two of us, I adjusted things slightly, with my changes noted in parentheses in the recipe below.

Both my husband and I really liked these breakfast enchiladas. They filled us up, but I didn't feel so full after eating them (the lack of tons of cheese probably helped), like I often do when I have enchiladas. The one thing that was lacking though, was spice. The recipe calls for one chipotle pepper to be blended with the black beans to make the sauce, but I tasted zero spice in the finished dish. Next time, I will add two (or three!) chipotles, so the sauce really has a kick. But that, of course, is just personal preference, and if you have a low heat tolerance, stick with one.

Scrambled Egg Enchiladas with Black Bean Sauce
Prevention Magazine, Summer 2009

2 Tbsp vegetable oil, divided (extra virgin olive oil)
1/2 small onion, sliced 1/4 inch thick
2 cloves garlic, chopped
1 15 oz can black beans, with liquid
1 C water (1/2 C)
1 canned chipotle pepper in adobo sauce
1 1/2 tsp salt, divided
6 corn tortillas (5)
4 scallions, thinly sliced
7 large eggs (5)
3 oz Neufchatel cheese, cubed (cream cheese)
3/4 C shredded Mexican Chihuaha or Cheddar cheese (pre-shredded Mexican blend)
2 Tbsp chopped cilantro

Heat oven to 400 degrees.

Warm 1 Tbsp oil in large skillet over medium heat. Add onion. Cook until golden, about 7 minutes. Add garlic and cook 1 minute. Scoop into blender, leaving oil. Set pan aside. Puree onion and garlic with beans, water, chipotle pepper, and 3/4 tsp salt until smooth. Season with more salt, if desired.

Lay tortillas on baking sheet. Lightly coat both sides with oil. Bake until pliable, about 3 minutes. Remove, stack, and keep warm.

Return skillet to medium heat. Add 1 Tbsp oil and scallions. Cook until soft, 2 to 3 minutes. Whisk eggs and 3/4 tsp salt. Add to pan and stir every few seconds until eggs barely set. Remove from heat and stir in cream cheese.

Put 1/2 C sauce in a 11" x 7" (8" x 8") baking dish. Fill tortillas with eggs, roll up, and put in dish. Pour the rest of sauce over enchiladas, covering completely. Sprinkle with cheese and bake until hot, 10 to 12 minutes. Sprinkle with cilantro and serve.

January 26, 2011

Basic Pizza Dough.


Pizza is one of our favorites. We have a few favorite places when we feel like going out, but we love homemade pizza, too. I have always cheated and bought the ready to top & bake dough from Trader Joe's, since it is easy, cheap, and tastes good.

My husband gave me a bread machine for Christmas and aside from making bread, I was really excited to make pizza dough. It had to be a lot easier than the time I tried to make it myself, since I could just throw everything in & let the machine do the work. 

There were a few more steps than I expected after the machine did its work (kneading & letting the dough rest, flatting it out & letting it rest), but it wasn't hard & while the dough was resting, I prepped my other ingredients.

I loved how the dough turned out after it was cooked. It was substantial, hearty, and held up well to the sauce (I tend to go heavy) & lots of toppings. Sometimes, the Trader Joe's dough gets soggy, so I was happy when mine didn't. The outside was nice & crisp and the inside was spongy & delicious. The only thing I wish I would have done differently was grease my pan before baking. I had to use a spatula, serrated knife, and lots of muscle to get the pizza off (and some crust stayed with the pan).

Basic Pizza Dough (for bread machine)

1 tsp dry yeast
3 3/8 C bread flour
1 Tbsp milk powder
1 3/4 Tbsp sugar
1 tsp salt
1 Tbsp butter
1 7/16 C water

Following instructions for the bread machine, add ingredients, turn machine on, and select pizza from the menu. 

When machine is done, remove dough and knead on a lightly floured surface until it springs back when pushed. Separate into two balls. Let rest for 10 minutes. 

Roll out one (or both) balls and place on a baking sheet. Prick dough several times with a fork. Let rest 15 minutes. 

Top with desired toppings, bake at 375 for 20 minutes.

- - - - - - - - - - 
Last night, we had BBQ chicken. I boil one chicken breast, let it cool, and then shred it (one breast is always too much meat, but I save the left overs for a salad for my lunch the next day). While the chicken is boiling/cooling, I chop some fresh pineapple (an addition that I learned on a trip to Hawaii & we love!), chop fresh cilantro (I forgot last night, shoot!), and thinly slice red onion. When the dough is ready to go, I spread on BBQ sauce, lightly sprinkle mozzarella cheese, add toppings and cover with more mozzarella & goat cheese, if I have it. So yummy.

January 17, 2011

Toasted Marshmallow Shake.


I have been hearing about this amazing toasted marshmallow shake from New York City's Stand for months & months. I have had my fingers crossed that my husband gets sent to NYC for business, so that I can accompany him & taste this shake for myself. As it hasn't happened, I figured I should turn to Plan B: Make it myself. And when I found the recipe on Gourmet, I was excited to do just that.

I definitely need to make this again, mostly because I realized I didn't get the marshmallows toasty enough. The milkshake tasted like a (rich & yummy) vanilla milkshake, and not a toasted marshmallow shake, unless you happened to suck a marshmallow bit (which we LOVED!) through the straw. Only then did we taste the flavor of a smoky, toasted mallow. I wanted the toasted flavor with every sip.

I also found that 1 tablespoon of milk wasn't enough to thin out the ice cream so that it could blend well. Or maybe my dollop of yogurt was too small. I would use the recipe as a starting point and then add more liquid as you need it.

Toasted Marshmallow Shake
Gourmet Online

3 scoops vanilla ice cream
1 Tbsp whole milk
1 large dollop yogurt
5 Kraft Jumbo Jet-puffed marshmallows
whipped cream

Toast marshmallows under a broiler, or, if you're frisky, over a flame until they just start to blacken evenly (the trick is to make sure it's evenly toasted and dark, but not turned to charcoal). - I used my kitchen torch and it was very fast & easy.

Put the milk, yogurt, and then ice cream in the blender. Blend carefully, just until you get a "donut"—when you see the shake holding to the sides of the blender with a hollow core.

Add three of the toasted marshmallows to the blender, and whirl it just until they're all broken up and distributed evenly. Be careful not to overblend it, making it too melty.

Pour shake into a glass, top with a dollop of whipped cream, break the last two marshmallows on top, and serve with an extra-wide straw.

January 12, 2011

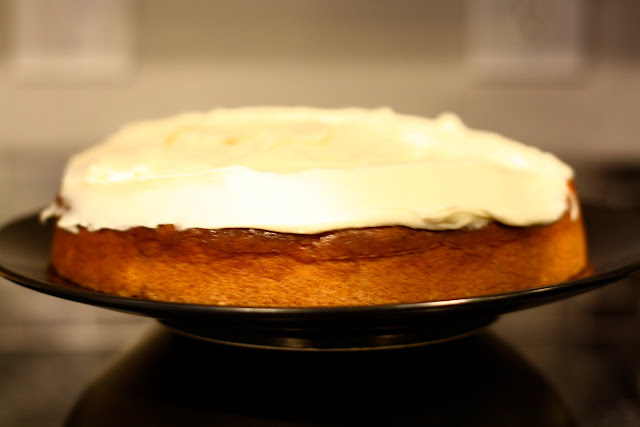
Old-fashioned Banana Cake.


My husband gave me the new Barefoot Contessa cookbook, How Easy is That?, for Christmas. I have more than a handful of recipes flagged as to make & have already found a couple new favorites that will be going into our permanent rotation.

The three (ugly) bananas on my counter were screaming banana bread. But! Then I remembered that one of the recipes I wanted to make was Old Fashioned Banana Cake.

So I did.

If you like banana bread, you'll like this cake. Think the flavor of banana bread, but the consistency of cake, plus a healthy dollop of cream cheese frosting. Yeah, yum. It stays really moist from the addition of sour cream. My favorite part was the addition of orange zest; I could really taste it & it added such a nice freshness.

The cake is something that I will make again, when I have bananas that are more brown than yellow & want something more indulgent than banana bread, which is typically my go to.

Old-fashioned Banana Cake
Barefoot Contessa - How Easy Is That?

3 very ripe bananas, mashed
3/4 C granulated sugar
1/2 C light brown sugar, lightly packed
1/2 C vegetable oil
2 extra large eggs, room temperature
1/2 C sour cream
1 tsp vanilla extract
Grated zest of 1 orange
2 C all-purpose flour
1 tsp baking soda
1/2 tsp kosher salt
1/2 coarsely chopped walnuts*
Cream Cheese Frosting (recipe follows)
Walnut halves, for decorating

Preheat the oven to 350 degrees. Grease and flour a 9 x 2-inch round cake pan.

In the bowl of an electric mixer fitted with the paddle attachment, mix the bananas, granulated sugar, and brown sugar on low speed until combined. With the mixer still on low speed add the oil, eggs, sour cream, vanilla, and orange zest. Mix until smooth.

In a separate bowl, sift together the flour, baking soda, and salt. With the mixer on low, add the dry ingredients and mix until just combined. Stir in the chopped walnuts. Pour the batter into the prepared pan and bake for 45 to 50 minutes, until a toothpick inserted in the center comes out clean.

Cool in the pan for 15 minutes, turn out onto a cooling rack, and cool completely.

Spread the frosting thickly on to of the cake and decorate with walnut halves.

Cream Cheese Frosting

6 ounces cream cheese, at room temperature
6 Tbsp unsalted butter, at room temperature
1 tsp vanilla extract
2 1/2 C sifted confectioners' sugar

Mix the cream cheese, butter, and vanilla in the bowl of an electric mixer fitted with the paddle attachment on low speed until just combined. Don't whip! Add the sugar and mix until smooth.

*My husband says no thank you to nuts, so I left them out.